
Modularity
- Tom Pow
- Nov 16, 2023
- 2 min read

Now that my blockout was complete and set up in engine, the next step was to refine my models, with the goal of creating a modular kit which I could use to build my shop.

First off, I noticed some clipping on the bottom of my doorway in Unreal, so I recreated the mesh and added a small step to the doorway.

Before beginning the process of refining my meshes, I laid out all the pieces that made up my blockout and arranged them above my shop so that I could work on them more easily.

I began with the shopfront piece, creating a new cylinder and lowering the sub divisions. From there I extruded the faces, creating offsets and extruding them inwards to form the window frames.
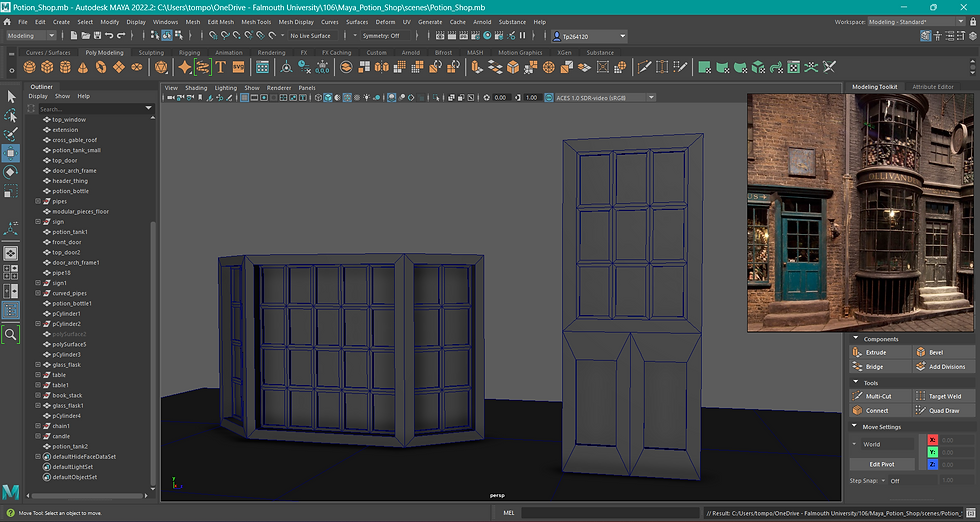
I used the same method to create frames for my windows and doors, looking carefully at references as I worked. I noted down the values for my extrusions in order to make the frames look consistent across both objects.

Next, I looked at the potion bottle, deciding to start from scratch. I brought back my references from Harry Potter to get the shape right. You can see the blockout on the left compared to the refined version in the middle. I also created a second mesh to go inside of the bottle which would act as the potion liquid. This would be visible when I applied a glass material to the bottle in Unreal later.

Here you can see the details I added to the brewery tank. Using my reference board, I extruded the shape to add a bit of visual interest.

After that was done, I created a chain for my shop's sign. To do this, I started with a torus shape and manipulated the attributes. Then I simply duplicated and rotated it a couple of times.

To connect the pipes, I combined them into one mesh, deleted the faces on the ends and used the bridge tool with the curve type set to blend.

Next, I created a simple table for the shopfront display area, and started working on objects to place on top of it.

I modelled a book from a basic cube and duplicated it to make a stack.

These are the objects I created for the display window; a smaller version of the potion bottle I made earlier, a candle and the book stack. Now that the pieces had been created, I could duplicate and rearrange them freely.

This is the final modular kit. When comparing it to the blockout, I think i added a good level of detail and refinement, although some pieces like the sign could defintely have been pushed further.
References:
www.youtube.com. (n.d.). The Two Easiest Ways to Make Pipes in Maya - TUTORIAL. [online] Available at: https://www.youtube.com/watch?v=l5_FVnzwKdY&list=PLgxGyW6wkVQTF4m0rOzFuZ95KlmKpBREt&index=1&t=19s [Accessed 16 Nov. 2023].
www.youtube.com. (n.d.). Modeling Bay Style Windows - Maya Modeling Windows Part 3/5 (Modeling Better Environments w/Maya). [online] Available at: https://www.youtube.com/watch?v=sSQDv5ZNTAI&t=670s [Accessed 16 Nov. 2023].


Comments